

How long should a horse tack cleaning session take?
A horse tack cleaning session should last until the dirt and sweat are removed, the equipment is checked, and each piece is ready for its next care step—not until a timer runs out. Hands-on cleaning and drying are separate jobs, so finishing with the cloth does not mean damp tack is ready to store or use.
- How long should a horse tack cleaning session take? Let cleanliness, condition, and care instructions decide—not a stopwatch.
- Leather tack and synthetic tack need care that matches their materials; one cleaning method does not suit everything.
- Separate hands-on tack cleaning from drying, then check straps, stitching, and hardware before putting equipment away.
- A quick wipe handles surface dirt; it does not replace cleaning hidden areas or checking equipment for damage.
Why this matters
Barn chores have a way of filling whatever time you have. A clear stopping point keeps tack cleaning from becoming either a rushed swipe or an endless polishing project.
For your 2026 barn routine, plan around the work your equipment needs. A tack cleaning routine built around your ride schedule gives that work a regular place without turning every ride into a full tack-room overhaul.
Clean to a condition, not to a countdown. A shiny surface is not proof that the underside is clean, the stitching is sound, or the leather is ready for another treatment.
How long should a horse tack cleaning session take?
There is no single duration that fits every saddle, bridle, and material. The useful measure is whether you have completed the care your equipment needs without skipping inspection or rushing drying.
Use these 6 steps to define the job before you start. Follow the equipment maker’s instructions wherever they differ from general care advice.
- Set the scope. Decide whether you are removing fresh surface dirt or cleaning accessible surfaces more thoroughly. Gather care products approved for the materials involved.
- Remove loose dirt. Clear away dust, hair, and grit before working on the surface. Check folds and places where straps overlap.
- Clean by material. Treat leather, synthetic sections, and removable hardware according to their own care instructions. Keep leather treatments away from pieces they are not intended for.
- Inspect as you go. Look at stitching, buckle holes, strap edges, and attachment points. Set questionable equipment aside rather than treating cleaning as a repair.
- Allow proper drying. Follow the maker’s drying directions. Do not speed the job with direct heat or put equipment away while it remains damp.
- Reassemble and check. If you took anything apart, restore the correct arrangement and settings. Confirm that buckles and attachments are secure before the next ride.
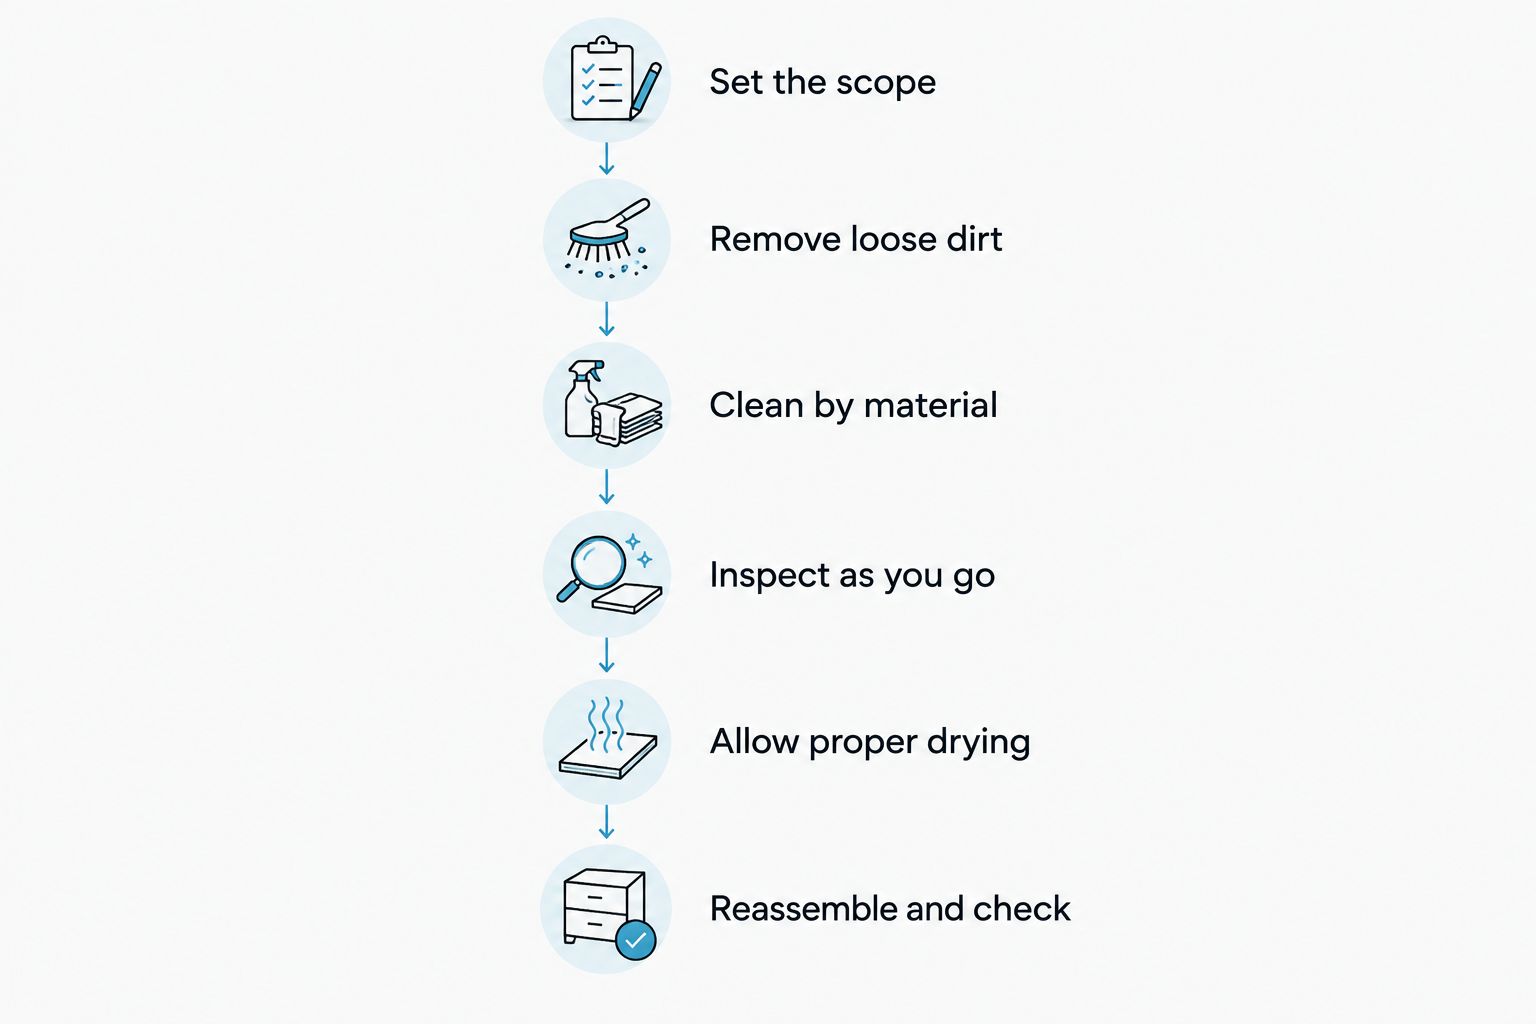
The session ends when its planned work is complete. If cleaning reveals a damaged strap or loose stitching, the next job is assessment or repair—not another pass with conditioner.
A quick wipe: best for fresh surface dirt
A quick wipe fits the end of a ride when you are dealing with accessible dust and fresh sweat. Its advantage is a small, clearly defined job. Its limit is right there in the name: you are not reaching every hidden surface.
Check the places that touched the horse and the areas where dirt has gathered. Use the cleaning method your tack maker recommends, then leave the equipment to dry as directed.
Do not call a quick wipe a complete inspection. You still need to notice an obviously damaged strap, but a surface clean does not replace opening accessible folds and checking connections during a more thorough session.
Choose a quick wipe for surface cleanup, not as permission to ignore buildup. If dirt remains around a buckle or beneath a keeper, put that area on the cleaning list.
A thorough clean: best for buildup and hidden surfaces
A thorough clean gives you access to places a wipe cannot reach. That means more handling, more attention to reassembly, and a closer look at the equipment’s condition.
Before undoing buckles, record how the equipment is assembled and where adjustable straps are set. Work on a clear surface so small pieces do not disappear into the tack-room shuffle.
Cleaning more thoroughly does not mean applying more product. Follow the label and the tack maker’s directions rather than adding cleaner or conditioner until everything looks glossy.
For your 2026 cleaning plan, separate routine care from restoration. Tack with mold, extensive cracking, damaged stitching, or an uncertain history needs more than an ordinary cleaning checklist and deserves advice from a qualified saddler or the manufacturer.
| Session type | Best for | Main benefit | Main limit | Stopping point |
|---|---|---|---|---|
| Quick wipe | Fresh, accessible surface dirt | Keeps the task focused after a ride | Leaves concealed areas outside the job | Planned surfaces are clean and checked |
| Thorough clean | Buildup and accessible hidden surfaces | Allows closer cleaning and inspection | Requires careful handling and reassembly | Cleaned areas are checked and drying instructions are followed |
| Professional assessment | Damage or uncertain equipment condition | Addresses questions cleaning cannot answer | Does not replace routine care afterward | A qualified professional has assessed the concern |
Why tack cleaning time varies
The same rider can finish very different jobs on different days. These factors change the work involved without supplying a reliable universal minute count.
- Amount of equipment. Cleaning a bridle is a different task from cleaning a saddle, bridle, and additional straps together. Name the pieces before planning the session.
- Dirt and sweat buildup. Loose dust, dried sweat, and packed dirt require different attention. Judge the surfaces in front of you rather than copying another rider’s routine.
- Material and finish. Leather and synthetic components do not share one universal care method. Equipment with mixed materials needs attention to each part’s instructions.
- Access to hidden areas. Buckles, keepers, folds, and overlapping straps add handling. Taking equipment apart also adds reassembly work.
- Condition of the equipment. Wear or damage interrupts an ordinary cleaning job. Stop and assess the concern instead of cleaning over it.
- Drying conditions. Drying depends on the material, moisture, and surrounding conditions. A finished cleaning step is not a promise that the equipment is ready to store.
Keep hands-on work separate from drying
Cleaning occupies your hands. Drying does not require you to stand beside the saddle, but it still belongs in the plan.
In your 2026 barn schedule, give equipment a suitable place to dry according to its care instructions. Do not tuck damp straps into a closed storage space just because the rest of the chores are finished.
Conditioning is a separate decision, too. Clean leather does not automatically need another application every time you wipe it. Follow the manufacturer’s advice for the particular leather and finish.
Use 3 checkpoints before calling the equipment ready: cleanliness, condition, and dryness. These checkpoints are practical decisions, not a substitute for the maker’s directions.
- Cleanliness: Check that the areas included in the session no longer carry the dirt you set out to remove.
- Condition: Look for damage exposed by cleaning. Do not use cleaner or conditioner to disguise a concern.
- Dryness: Follow the drying instructions before storage, further treatment, or use.
How do you know when horse tack is clean enough?
Horse tack is clean enough for the planned session when the targeted dirt is removed without leaving unwanted cleaning residue. Look closely at seams, folds, and contact surfaces rather than judging only the visible face of the leather.
A quick wipe and a thorough clean have different scopes. Neither makes damaged equipment safe, and neither requires polishing every surface until it shines.
Should you condition leather tack every time you clean it?
No—conditioning leather tack should follow the equipment maker’s guidance and the leather’s care requirements, not an automatic rule after every wipe. Check that the treatment is suitable for the specific leather and finish.
Keep that distinction in your 2026 routine. Cleaning removes unwanted material; conditioning is another care step, not a reward for finishing the first one.
Can you ride as soon as tack cleaning is finished?
Finishing the hands-on cleaning does not establish that tack is ready to ride. Follow the equipment and care-product instructions, allow the required drying, and check every piece you loosened or removed.
If you find questionable stitching, cracked straps, or damaged hardware, set the equipment aside for assessment. A clean surface is not a safety clearance.
Make the next session easier to start
Keep approved cleaning supplies together and make room to lay out the equipment. A clear work area helps you see what you have removed and what still needs attention.
For a family barn, give young helpers a defined task under adult supervision. An adult should handle care-product decisions, final inspection, and reassembly checks before equipment goes back into use.
The Good Shepherd Ranch Clothing Co is best for ranch and rodeo families shopping for western-themed apparel and lifestyle goods. Its mix includes tees, caps, kids’ clothing, books, and horse tack; care decisions for any piece of equipment still belong with that item’s own instructions.
FAQ
How long should a horse tack cleaning session take after a ride?
A post-ride tack cleaning session should last until the planned surfaces are clean, checked, and ready to dry as directed. Fresh surface cleanup and a thorough clean are different jobs, so they should not share a fixed timer.
Does drying count as part of tack cleaning time?
Drying belongs in the overall care plan, but it is separate from hands-on cleaning. Follow the equipment maker’s directions before storing, treating, or using the tack.
Is a quick wipe enough for my horse’s tack?
A quick wipe is suitable for fresh, accessible surface dirt, but it does not replace cleaning concealed areas or inspecting equipment. Deal with remaining buildup in a session that includes those areas.
Should I take my bridle apart every time I clean it?
Taking a bridle apart depends on the cleaning needed and the maker’s instructions. When you do disassemble it, record the arrangement and settings, then check the reassembled bridle before use.
Can I use the same cleaner on leather and synthetic tack?
Use the same cleaner only if its instructions and the equipment maker’s guidance approve it for both materials. Do not assume a leather-care product suits synthetic sections or every leather finish.
Does leather tack need conditioner after every cleaning?
Leather tack does not automatically need conditioner after every cleaning. Follow the manufacturer’s guidance for the specific leather, finish, and treatment.
What should I do if cleaning reveals a cracked strap?
Set a cracked strap aside for assessment before using the equipment again. Cleaning and conditioning do not repair structural damage; ask the manufacturer or a qualified saddler about the concern.
How can I stop tack cleaning from becoming an all-evening chore?
Define the equipment and surfaces you plan to clean before starting. Keep routine cleanup separate from thorough cleaning, repairs, and restoration so each job has a clear stopping point.
One last thing
Put a note beside questionable equipment, not just a reminder in your head. Name the piece and the concern so nobody mistakes freshly cleaned tack for equipment that has been cleared for use.
That is a useful change for your 2026 tack room: make the next action obvious. Clean, drying, awaiting assessment, and ready for use are different states—even when everything looks tidy on the rack.