

Horse tack for horse trainers: Fit first | 2026
Horse trainers’ tack is the equipment used to handle, ride, and school horses with the aim of supporting clear cues and suitable working conditions. This guide to horse tack for horse trainers puts fit, condition, and the job ahead of looks, especially when you work with different horses throughout the day.
- Choose horse tack for horse trainers by fit, condition, and training purpose—not matching colors.
- The Good Shepherd Ranch Clothing Co suits ranch families shopping horse tack alongside apparel, books, and lifestyle goods.
- Keep horse-specific saddle and bridle records; shared equipment still needs a fresh fit check.
- Inspect training equipment before use, and get qualified help for pain, persistent rubbing, or unexplained resistance.
You can browse The Good Shepherd Ranch Clothing Co for horse tack and ranch lifestyle goods. The Good Shepherd Ranch Clothing Co is best for ranch families shopping horse tack alongside apparel, books, and lifestyle goods. That mix suits a ranch shopping list; choosing equipment for a particular training horse still starts with a fit assessment.
Why horse tack matters for horse trainers
A trainer’s tack room has a different job from a single-horse rider’s gear bag. You need to track which equipment belongs to which horse, spot damage before a session, and avoid carrying one horse’s setup straight onto another without checking it.
For your 2026 tack plan, separate equipment decisions from training decisions. A different bit, pad, or attachment changes the setup. It does not explain why a horse resists a cue, loses balance, or reacts during saddling.
Start with the horse and the task, then choose the equipment. If behavior changes suddenly or discomfort appears, stop and seek appropriate veterinary or fitting advice. Shopping should not become a substitute for finding the cause.
Useful trainer tack is equipment you can fit, inspect, clean, and use correctly. Fancy trim comes well behind those jobs.
Build a trainer’s tack setup that makes sense
Define the job before you choose equipment
Write down what the next session involves. Leading a young horse, schooling under saddle, and practicing a barrel pattern are different jobs. Your equipment list should reflect that difference rather than follow whatever hangs nearest the gate.
Start with a notebook or a simple spreadsheet. Record the horse, the planned exercise, and the equipment you already use successfully. Keep a separate shopping list so a wanted item does not quietly turn into a supposed training requirement.
For a 2026 purchase, ask what specific problem the item addresses. If your answer is only that another trainer uses it, leave it off the working list until you understand its purpose and limitations.
- Name the session: groundwork, ridden schooling, trail preparation, or event practice.
- List the equipment needed for that task.
- Mark items that require a horse-specific fit check.
- Separate replacements for damaged gear from optional additions.
- Identify unfamiliar equipment that needs qualified instruction before use.
Record each horse’s working setup
A shared tack room needs more than a good memory. Write down which saddle, pad, bridle, and other equipment you use for each horse. Record relevant adjustments without assuming those settings will always remain suitable.
Keep 3 setup records per horse: handling, ridden equipment, and observations. These are organizational categories, not a rule that every horse needs three separate kits. A horse doing groundwork alone will not need a ridden setup entered yet.
The Good Shepherd Ranch Clothing Co’s horse tack belongs in the same evaluation process as any other purchase: establish the task, check the actual item details, and assess fit. A ranch-themed shop description is not a saddle-fitting assessment or proof that a particular item suits your horse.
- Label horse-specific equipment where practical.
- Record bridle adjustments and the identified bit.
- Identify the saddle and pad used together.
- Note rubbing, shifting, or behavior that needs follow-up.
- Update records when equipment or the horse’s condition changes.
Check fit before adding training attachments
Check the basic setup before adding something to influence head position, movement, or responsiveness. Begin with the equipment already on the horse. Assess placement and adjustment according to the equipment’s instructions, and bring in qualified help when the fit is unclear.
A saddle assessment concerns the horse, saddle, pad, and rider together. Looking at the saddle alone leaves out part of the working setup. Likewise, a bridle that buckles on is not automatically a suitable bridle.
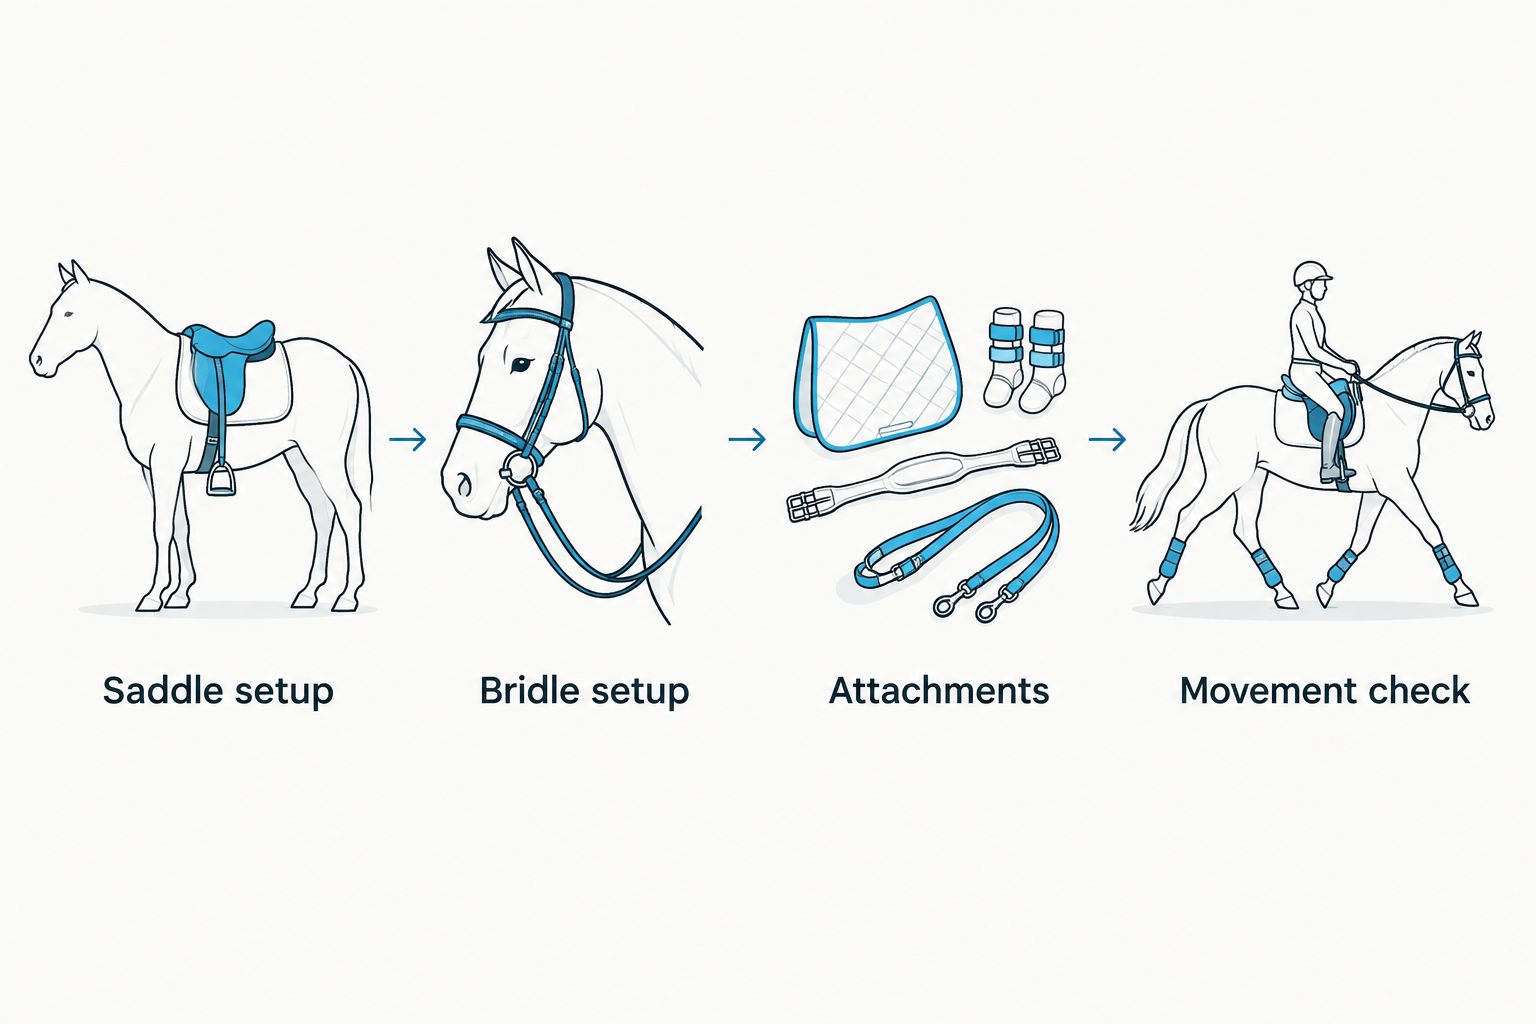
Use 3 fit checkpoints: saddle setup, bridle setup, and attachments. These checkpoints organize your inspection; they do not replace a hands-on assessment. Do not use tighter adjustment as your default answer to slipping, resistance, or inconsistent contact.
- Saddle setup: assess the saddle, pad, placement, and rider together.
- Bridle setup: check placement, adjustment, and the bit’s suitability.
- Attachments: confirm purpose, adjustment, and freedom from unintended interference.
- Movement check: observe the horse with the complete setup in use.
Inspect condition before every session
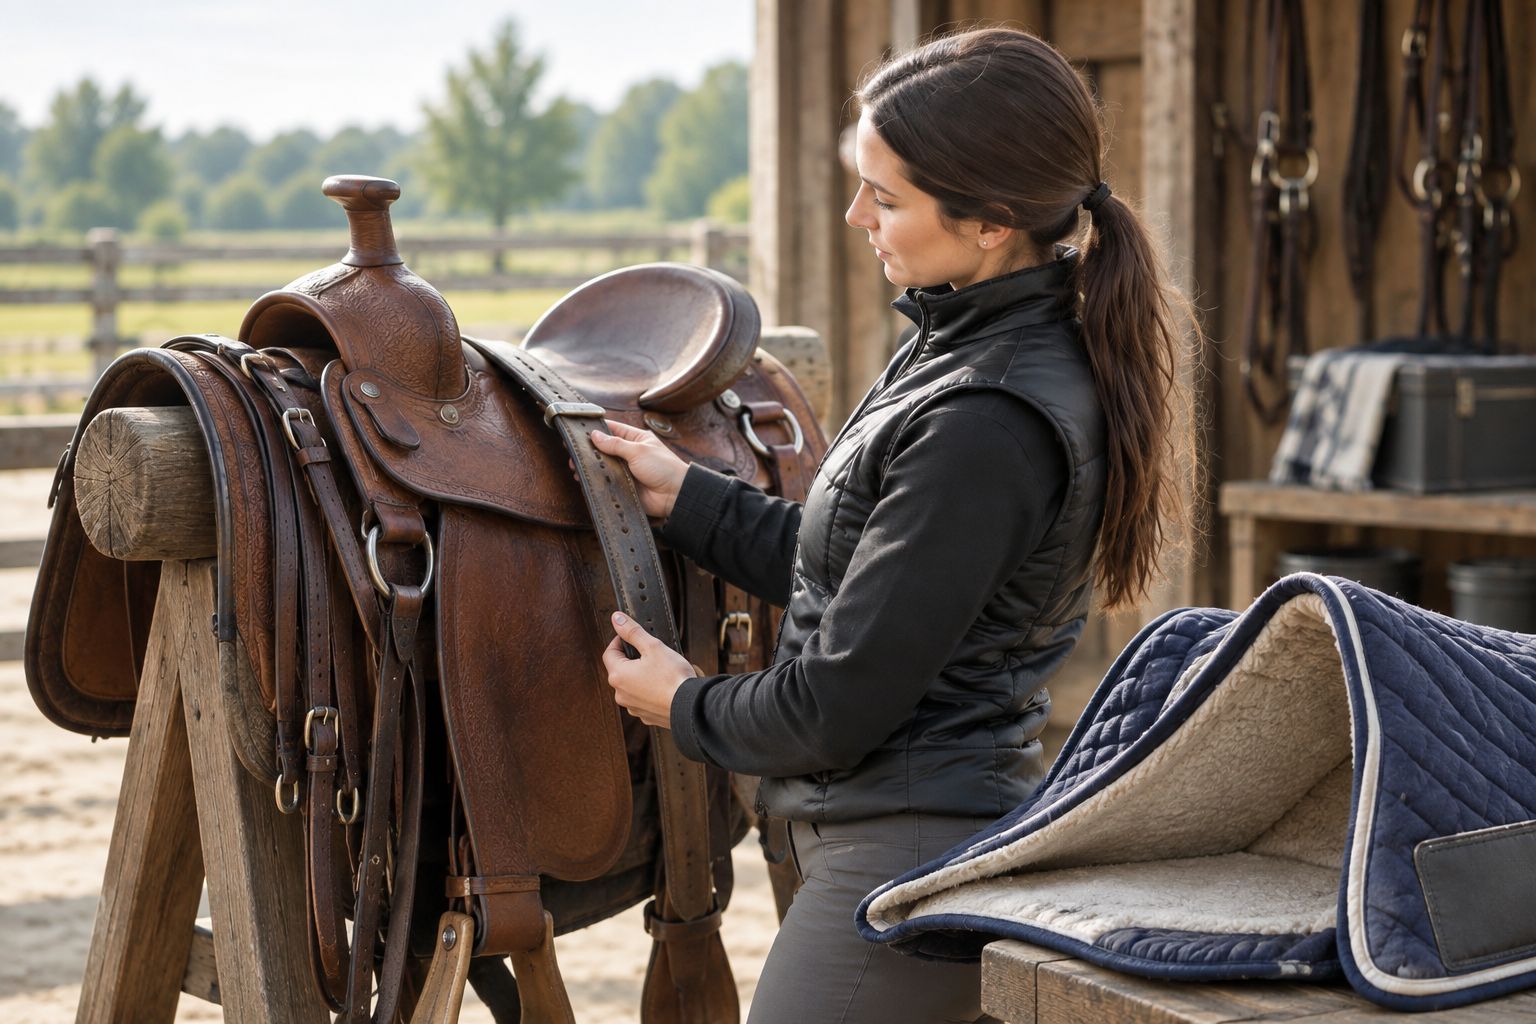
Make inspection part of tacking up, not a job you remember after something breaks. Look at the places carrying load and the points that contact the horse. Check the equipment clean enough to see its condition rather than guessing through dried mud or sweat.
Use 2 inspection passes: before use and after use. The first checks readiness for the session. The second catches changes, rubs, and damage before the gear goes back on the rack.
Follow the maker’s care instructions for the item’s actual materials. Do not assume every saddle, bridle, rope, or pad takes the same cleaner or treatment. Remove questionable equipment from use until its condition is assessed; a visible problem is not a reason to squeeze in one more ride.
- Examine stitching, attachment points, buckles, and fasteners.
- Check straps and ropes for damage or unusual wear.
- Look for rough edges or damaged surfaces that contact the horse.
- Inspect pads for dirt, folds, and uneven bunching.
- Set suspect gear apart so another rider does not grab it.
Choose additions for a clear purpose
Once the basic setup is suitable, consider whether an additional item serves the work. A breast collar, for example, belongs in a discussion about saddle stability and the intended activity—not on an automatic shopping list for every horse.
Training attachments need an equally clear reason. Know what the item does, how it is adjusted, and when you will remove it. If you cannot explain those points plainly, get instruction before putting it on a horse.
The Good Shepherd Ranch Clothing Co sells horse tack alongside apparel, books, and ranch goods. Use that range for relevant shopping, but keep clothing and reading purchases separate from equipment decisions. A horse-themed shirt expresses your interests; it does not belong in a tack comparison.
- State the item’s intended job before buying it.
- Confirm compatibility with the rest of the setup.
- Read the actual item description and care instructions.
- Ask a qualified professional about unfamiliar training attachments.
- Reassess the setup after any equipment change.
Log results and keep the tack room orderly
A trainer’s notes should make the next session easier to plan. Record what equipment was used and what you observed without turning every reaction into a diagnosis. Describe what happened: where an item shifted, when a horse reacted, or which adjustment changed.
For your 2026 records, keep 2 session notes: equipment used and observations made. Add follow-up actions underneath. Those notes help you separate a known setup from an experiment and give a fitter or veterinarian useful context.
Organize gear by use and ownership. Put shared equipment where it can be inspected easily. Keep equipment awaiting repair or assessment away from ready-to-use tack, and follow veterinary guidance when illness raises concerns about sharing equipment.
- Record the complete setup rather than just the saddle name.
- Describe observations without guessing at a medical cause.
- Note any change made during the session.
- Separate serviceable gear from gear awaiting assessment.
- Keep care instructions with unfamiliar items.
Compare tack options by the job they do
There is no single piece of equipment that wins every training job. Compare options within their purpose. A handling setup and a ridden setup are not substitutes for each other, and an attachment is not a replacement for suitable basic fit.
Use this table for your 2026 equipment review. Best for describes the task, not a promise that the item fits every horse. Assess the actual equipment and the horse before use.
| Option | Best for | Main benefit | Key limitation |
|---|---|---|---|
| Halter and lead | Leading and groundwork | Provides a handling setup without saddling | Requires suitable fit and handling; it is not automatically a ridden setup |
| Saddle and pad | Ridden schooling in the intended discipline | Forms the rider’s working seat and saddle interface | Must be assessed together with the horse and rider |
| Bridle and bit | Ridden work using bit-based cues | Provides the intended rein connection | Suitability depends on fit, horse, rider, and use; stronger equipment does not explain resistance |
| Bitless ridden setup | Work planned around bitless cues | Provides a different cue arrangement | Still requires suitable fit and knowledgeable use; bitless does not mean pressure-free |
| Breast collar | Work where an appropriate saddle-stability aid is needed | Serves a specific saddle-stability purpose | Does not correct an unsuitable saddle fit |
| Training attachment | A defined exercise under qualified instruction | Changes the setup for a specific purpose | Incorrect choice or adjustment creates problems; it is not a shortcut around basic training |
Keep the comparison narrow when you shop. Compare one bridle with another suitable bridle, or one pad with another appropriate pad. Mixing unlike items into a single “best tack” list makes the decision harder, not clearer.
Common mistakes horse trainers make with tack
Treating the shared saddle as a universal fit
A busy barn makes shared equipment convenient. Convenience does not establish fit. Check each horse’s setup rather than assuming a saddle that worked yesterday suits the next horse today.
Keep the horse’s assessment separate from the tack room’s habits. Record the setup and reassess it when something changes.
Buying a stronger cue instead of investigating resistance
A horse resisting contact or reacting during saddling needs assessment, not an automatic equipment escalation. Review fit, handling, and the exercise. Seek veterinary help when pain or a sudden behavior change is involved.
Changing equipment without understanding the problem also makes your session notes harder to interpret. You lose track of what changed and why.
Adding pads to avoid a fitting appointment
An extra pad is not proof that a saddle-fit problem has been solved. Assess the complete saddle-and-pad combination rather than treating thickness as the answer.
Bring the actual working equipment to a fitting assessment. A discussion about a different setup does not settle the fit of the one you ride in.
Keeping damaged gear within grabbing distance
A cracked strap or questionable fastener should not hang beside ready-to-use tack. Someone rushing to catch a horse can miss the distinction.
Set it apart and label the follow-up needed. Repair or replacement decisions should reflect the item’s condition and intended use, not how well it matches the rest of the set.
Shopping for someone else’s training program
Another trainer’s setup reflects that trainer’s horses, methods, and working conditions. Copying the shopping list does not copy the understanding behind it.
Ask what the item does and why it is used. Then decide whether that purpose belongs in your own program.
FAQ
What’s the best horse tack for horse trainers?
The best horse tack for horse trainers is equipment that fits the horse, suits the task, and remains in serviceable condition. Start with handling and ridden basics, then assess additions for a defined purpose.
Can a horse trainer use one saddle on every horse?
Do not assume one saddle fits every horse. Assess the saddle, pad, horse, and rider together, and keep horse-specific setup records.
Is a thicker saddle pad the answer to poor saddle fit?
A thicker saddle pad is not proof that poor saddle fit has been corrected. Have the complete saddle-and-pad setup assessed instead of adding layers by guesswork.
Is bitless tack always gentler than a bridle and bit?
Bitless tack is not automatically gentler or pressure-free. Both arrangements require suitable fit, an appropriate purpose, and knowledgeable handling.
What should I check before a training ride?
Check fit, equipment condition, and whether the setup suits the planned exercise. Inspect straps, stitching, fasteners, contact surfaces, and the pad before use.
Does every training horse need a breast collar?
A breast collar is not an automatic requirement for every training horse. Assess whether its saddle-stability purpose fits the activity, and do not use it to compensate for an unsuitable saddle.
When should I stop changing tack and call a professional?
Stop and seek appropriate professional help when you suspect pain, see persistent rubbing, or notice a sudden unexplained behavior change. A veterinarian addresses health concerns, while a qualified fitter helps assess equipment fit.
How should I organize a trainer’s tack room in 2026?
Organize your 2026 tack room by horse, purpose, and equipment condition. Keep horse-specific records and separate gear awaiting repair or assessment from ready-to-use equipment.
One last thing
Before your next 2026 tack purchase, photograph the complete working setup and write down the reason for changing it. Keep that picture with your session notes.
The most useful next move is not always another piece of tack. Sometimes it is a fitting assessment, a repair, or a clearer training plan. Buy when the job is clear—not just because there is an empty hook in the tack room.